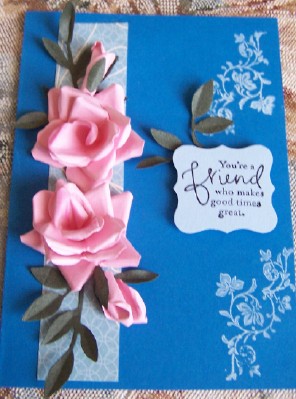
I made this beautiful Rose by using the SU Punch Fancy Flower Extra large. These Roses were on a previous lesson but I had to delete it as something had happened to all my photos. I had another request for the Tutorial so I thought I would rewrite it.
1. You will need 3 punched Rose Shapes for each Rose you make.
2. Shape each of the punchies with a rounded shaping tool this will give
each petal a cuped shape.
3. Roll each of the sides with a quilling tool around and towards the back of the Rose. This gives the petal a lovely curled back Rose Petal shape. If you do not have a quilling tool long nose tweezers work well too as well a wooden tooth pick will also roll the edges back.
4. After the petals have been rolled back Cut between one petal down to the centre of the Rose on two of the Rose punchies you have made.
5. Take the flower petal shape that is not cut from in betweentwo petals down to the centre. This shape I add some PVA Glue (white paper glue or wood glue) to the centre and allow it to become tacky before I take the next step.
6. Once you have cut between one of the petals to the centre overlap the two side petals on top of one another with glue. Leave to dry for a few minutes then cut the bottoms off the petal circle off the last two layers.
7. Then with closed tweezers or a quilling tool roll from the bottom right around the circle so the centre looks like this above.
8. Place 2nd layer into the petal that has the glue which is becoming tacky so it will hold the layer in place.
9 Know the last layer of the Rose is rolled and curled and placed in the centre of the two layer. It will look as it does below.
10 Finally the finished rose below. After the centre has been placed in position..
I hope you like this simple and easy Rose to make. You will be able to use it for many different applications.
hugs. Carolyn


Thank you so much for reuploading these pictures Carolyn. Now I hope, I´ll get to give these a try too, as they look like even I can find out how to make them LOL. Thanks soo much for sharing this hun.
ReplyDeleteBig hugs Maryann
Thank you .
ReplyDeletecame here from Shanni's blog.
Shirley-Anne